
How to Make Worm Castings at Home
To create worm castings at home, you’ll need some worms and a vermicomposter or worm composter. You’ll have to add suitable organic waste, replenishing it over time, and as time passes, you can start collecting the worm castings or vermicompost. This type of fertilizer stands out for its cost-effectiveness and the highly beneficial properties it adds to any substrate. In fact, many consider it the best or one of the best natural fertilizers.
If you’re eager to learn how to make your own worm castings, keep reading this article where we go through everything about this natural product for your plants.
What is Worm Castings?
As mentioned earlier, worm castings are a natural organic fertilizer. Natural fertilizers lack added chemical components and can be used in organic gardens and plantations, providing numerous benefits without resorting to artificial compounds, which are also more expensive.
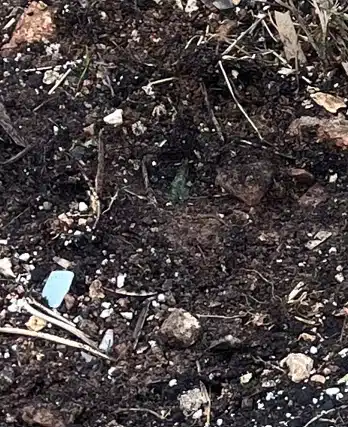
Worm castings are essentially the organic matter from the soil that worms have already digested, returning it to the soil in a decomposed form, creating a highly beneficial composition for plants. However, it’s essential to note that true worm castings occur only in forest soils, thanks to the entirely natural process that takes place there. What we can buy or produce at home is the organic matter produced by the worms, which is already super beneficial for plants.
The vermicompost has a fluffy texture that greatly aids soil aeration and water retention capacity without causing waterlogging. Additionally, due to the worms’ excrement, worm castings are rich in essential minerals such as nitrogen, potassium, phosphorus, and magnesium.
Another significant advantage of worm castings is their high concentration of beneficial microorganisms for plants, protecting them against harmful fungi and bacteria.
Step-by-Step Guide on How to Make Worm Castings
While making worm castings is cost-effective in the long run, initially, you need to acquire the worms.
- Worms can be purchased if you have no natural access. Or you can just dig in the soil after a summer rain, and you will most likely find plenty of worms crawling around. If you see a bunch of overly excited seagulls following a tractor ploughing an agricultural field, you can be sure there is plenty of worms.
- You’ll also need to prepare a vermicomposter or worm composter. There are various ways to create your own vermicomposter, and one of the simplest methods is using polystyrene or styrofoam boxes, readily available in many stores such as grocery or fish markets. With this system, you can produce both solid and liquid castings. You’ll need two boxes of similar size with lids.
- Once you have the materials mentioned earlier, make holes in the lid and the bottom of the upper box to provide ventilation and transpiration to the container. A common punch slightly thicker than a worm is sufficient for this.
- Next, in the lower tray, create a drain to utilize the liquid component of the castings. On one of its lower ends, make a hole the size of a plastic bottle neck, and fit the cut neck snugly into it. You can later seal the edges with glue or silicone to prevent leaks.
- After completing this, use the bottom of the same bottle to insert it into the centre of this lower tray. This serves as an “island” for the worms that fall below.
- Once the composter is ready, place it in a well-ventilated location and prepare a layer of peat in the upper tray, where you’ll place the worms alongside a few vegetable scraps. From here on, you just need to add vegetable waste to the vermicomposter, preferably cut or lightly shredded, and the worms will produce castings in a few weeks.
In this way, vegetable waste and peat remain in the upper tray, and the castings will accumulate in the lower tray, from which you can separate the liquid component through the drain at the bottom. If you’re wondering about the best way to make liquid worm castings, this is the simplest method, producing both solid and liquid castings simultaneously.
Read more about how you make your own compost.
How to avoid too acidic soil
As a final note, it’s crucial to add crushed eggshells to the vermicomposter to prevent the castings from becoming too acidic. Ensure not to let the mixture dry out excessively, adding some water if the castings become too dry.
Read more about the different types of homemade compost.
How to Use Worm Castings on Plants
Applying worm castings is as simple as mixing the solid castings with the substrate before planting. If you want to use it as a fertilizer for an already planted plant, simply apply a thin layer directly on the soil or around it, and rake it if dealing with large fruit trees.
Regarding liquid worm castings, applying them is even easier, as you just have to apply it with regular watering, mixed with water. Follow the recommended fertilization doses according to the type of plant you’re enhancing, and enjoy the many benefits of this comprehensive organic and ecological fertilizer now that you’ve ventured into vermicomposting. Additionally, you can learn more about the advantages of organic fertilizers here.


